Enphase Envoy - Manual Configuration for Internet Connection
STEP 1)
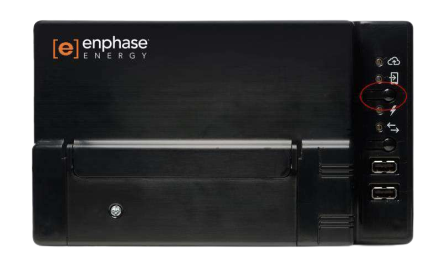
Press the top button on the Envoy S (underneath the phone icon, above the lightning bolt icon).
Step 2)
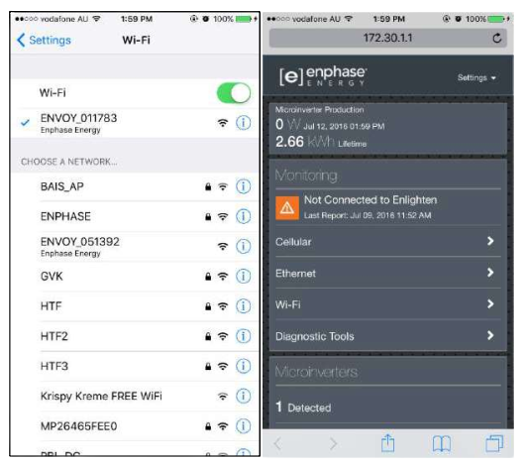
On a smartphone/laptop/computer, connect to the Envoy’s Wi-Fi network (ENVOY_xxxxxx where “xxxxxx” represents the last 6 digits of the Envoy serial number)
Step 3)
Open up any web browser
Type into the address bar “172.30.1.1” and press enter.
Once the Enphase Envoy page appears, click on “Wi-Fi”.
Step 4)
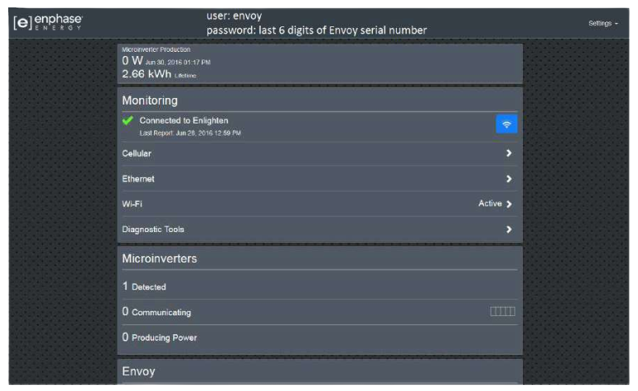
When prompted for login details, use these credentials:
Username: envoy (in lowercase)
Password: The last 6 digits of the Envoy serial number.
Step 5)
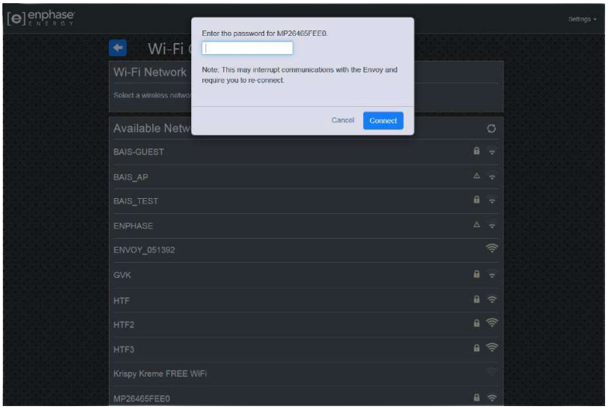
Under the heading “Wi-Fi Network” if there is a network the Envoy is currently connected to, you will first need to click “More Info” and then click on “Forget This Network”. After doing this, click on “View Networks” and in the list of Wi-Fi networks that show up, find the internet network you want to connect to and click on it.
Step 6)
Enter the password for the Wi-Fi network and click connect.
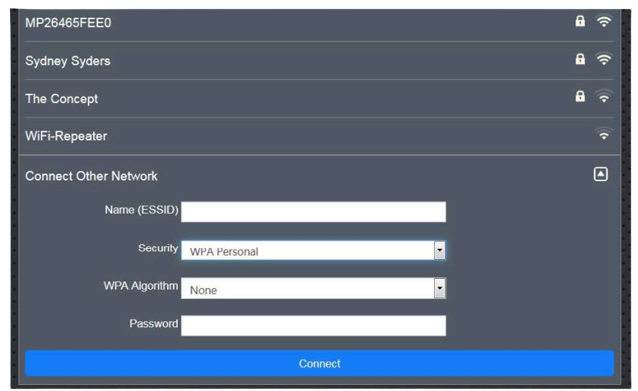
a) If successful, go to the next step. If the connection is unsuccessful, click on “Connect Other Network” which shouls appear at the end of the list of available Wi-Fi networks.
b) Enter the network name into “Name (EDDID)” and network password manually.
c) For the “Security” setting, select “WPA Personal”.
d) For the “WPA Algorithm” setting select “TKIP” (this setting appears after y ou have selected a security setting.)
e) Click “Connect”. If the test is unsuccessful again, repeat steps A to C, but change the “WPA Algorithm” to “TKIP + CCMP” and click “Connect”.
Step 7)
After a few minutes the connection should become active; click on the blue arrow button at the top next to the title “Wi-Fi Configuration” to go back to the previous screen.
Step 8)
Click the button “Open Connection” which is located at the bottom under Connection to Enphase Support (this simply pushes through the internet connection status to Enlighten).